Archive for the ‘Building’ Category

Front Winch Fun

Tuesday, August 11th, 2009

As I mentioned at the end of the last update, I’ve purchased a DIY 8274 holder from Devon 4×4. It looks like this.

The winch holder.

The winch holder.


However, because nothing is ever easy, it needs modifying as my winch is wider than standard (so I can get more rope on it), and it won’t fit on the milling machine.
Anyway, we drilled some holes in the chassis and dropped some tube through to hold the bolts, as the chassis is perhaps a little thin on its own.
Here it is in place. I perhaps need to come up with a more secure mounting system.

Here it is in place. I perhaps need to come up with a more secure mounting system.


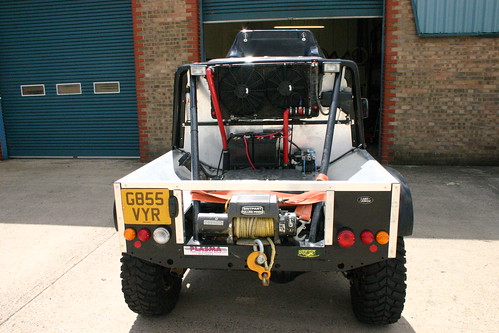
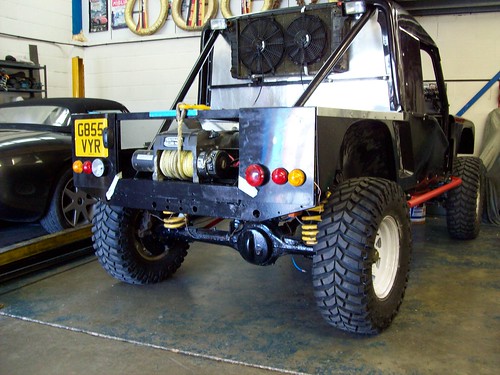
That’s about all that’s been done recently (and I’m not going to do any more until the end of August). Someone pointed out that there’s no pictures of the back of the car since the finishing strips were added, so here is one for you.
The rear, with finishing strips added.

The rear, with finishing strips added.

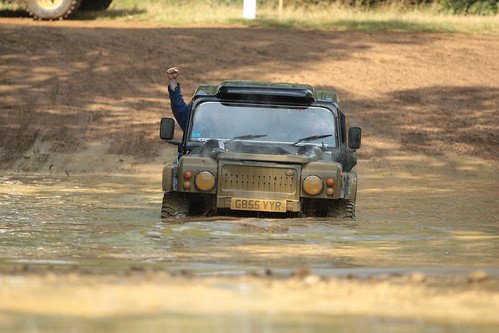
And here’s a photo to prove it actually moves!

Splash!

Splash!

Bloody thing still hates water, though.

Bugger.

Bugger.

The big push

Wednesday, July 22nd, 2009

So, suddenly, it’s Saturday 11th July, and we have less than a week left before the MOT. The list of this to do is, in fairness, pretty big. I’ll split them all up into sections, although in reality we were doing everything at once.

Let’s start with the exhaust system. The original V8 silencer is too big to fit now, so we used one from a 200TDi Discovery. On the advice of someone from the Internet, we ditched the smaller back box entirely, cut and welded the original rear pipe (with the bend to go over the axle), shortened it at the back and put it all back together.
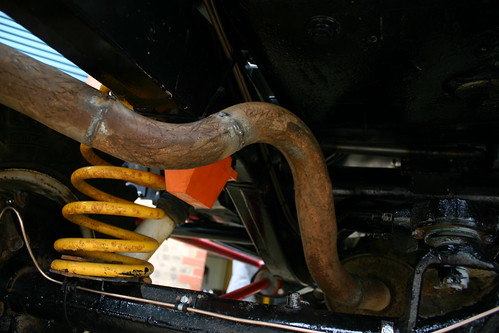
The rear exhaust

The rear exhaust

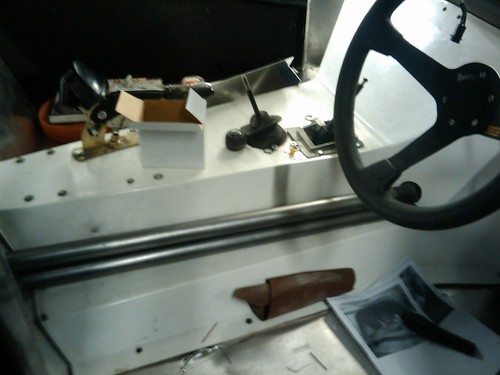
We still had no instruments or dashboard at this point, so, in the interests of saving money, we hacked a big hole in the Tomcat dashboard and fitted the original instrument cluster into it. This took a long time.
As we cut so much out, we had to add some strength to the dashboard, so we bent some ali up and bolted it in place.
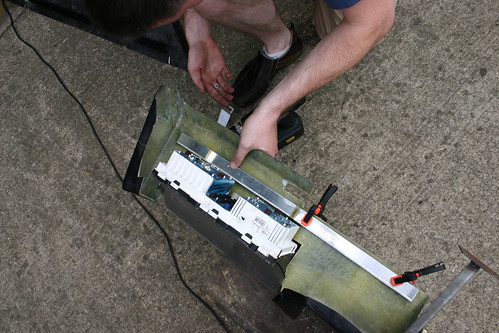
Strengthening the dashboard

Strengthening the dashboard

Then we cut holes for the four additional gauges (oil pressure and temperature (important as we’d ditched the oil coolers) and a voltage meter for each battery) and cut holes for all the switches.

Switch holders

Switch holders (note the lump chopped out of the back to allow the windscreen wipers to work)

Finally, it was time to put some wires into the car. We started at the engine, then made a small tray to hold a bunch of relays in a (hopefully) water-resistant box at the top of the pedal box.
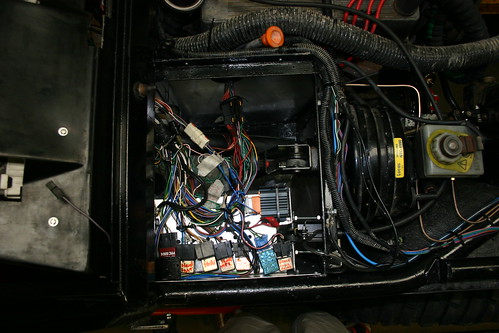
Relay box

Relay box

We used the original ignition and indicator / light stalks, too.

Ignition wiring

Ignition wiring

Then the dashboard went on, and all the switches and gauges were wired in. The wires were (mostly) hidden behind the dashboard.
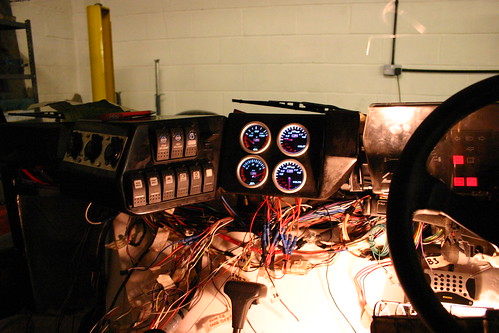
Dashboard wiring. On the left are three cigarette-lighter style power sockets.

Dashboard wiring. On the left are three cigarette-lighter style power sockets.

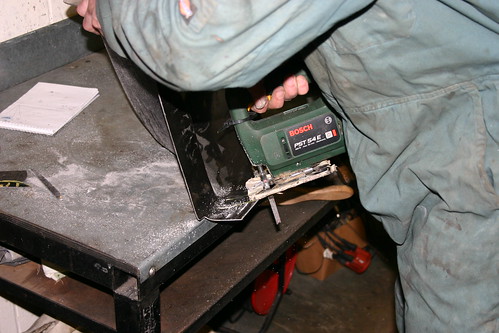
Next, we cut the holes for the headlights in the wings with a jigsaw cutter (badly) and used circle cutters to make the holes for the side lights. We also drilled air holes in the front panel – a temporary measure for the transmission radiator behind it. We decided we would never have time before the MOT to build a bespoke front bumper with the Warn winch, so we hacked the bits of the chassis that stuck out, too. Once the front panel was bolted to the wings the whole lot became very rigid.

Wings and front panel

Wings and front panel

Then (after replacing a faulty relay for the fuel pump) we fired up the engine, which was loud. Still, everything seemed to be working as expected.

The original washer bottle wouldn’t fit, so we bought a small kit-car washer bottle and fitted that in front of the passenger footwell (although the original would have gone on the back of the car quite nicely). We also bolted on the ARB air compressor and made a small battery ‘stand’ out of old desk legs. We ran the axle breathers along with the ARB diff lock lines.

ARB compressor and battery holder

ARB compressor and battery holder

It was time to fit the windscreen. We purchased some Master Bond windscreen sealant from eBay, primed the windscreen and then applied a thick layer of the stuff around the edge.
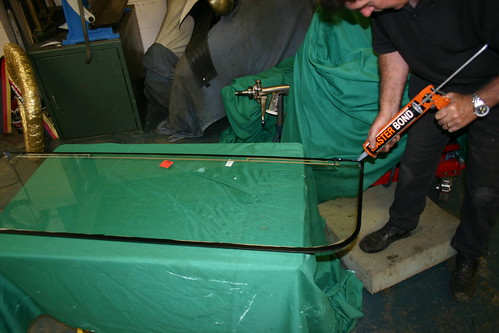
Applying the windscreen bonding

Applying the windscreen bonding

We held the windscreen in place overnight with a sophisticated tool designed just for the job. If you don’t have one like it I don’t know how you’ll manage, to be honest.

Complicated windscreen-holding tool

Complicated windscreen-holding tool

Lots of relatively simple things still needed to be done. The bonnet is fixed on with some home-made brackets at the back and some proper bonnet clamps at the front, a dead switch was placed just under the windscreen in front of the passenger and we checked all the lubricants. We also cut and shaped several lengths of right-angled aluminium to finish up the rear of the vehicle.

And then, suddenly, we were done.
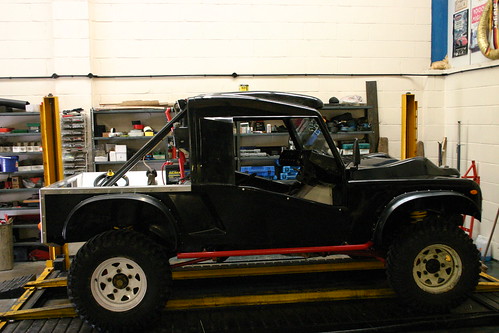
Ready!

Ready!

We tidied up wires and rubbed off all the paint guidelines we had made, added more rivets and siliconed up some gaps in the bodywork. Stickers were stuck, windscreen wipers (some cheap 12″ ones from a local auto shop) and washers were added and then trundled off to the MOT. It failed on one thing, which was the telltale light on the Fog Light switch (which always showed as ‘on’). We fixed that in a matter of minutes, took it back to the MOT station and got ourselves a ticket.

Then we taxed it, and took it through some mud!

Vroom!

Vroom!

We still have bits to do – it needs places for attaching towing shackles and rings to feed the winch through (in case we need to winch upwards, or something), it needs storage for ropes and bits added, storage for the high-lift jack, waffles, spare tyre and ground anchor. It also needs the front winch fitting, which should be much easier using the DIY 8274 winch holder I purchased from D4x4 at Billing (link). It also needs the distributor taking off and waterproofing, as it threw a fit in the water at Billing again.

So, we’re not quite done yet, then…

Wheel Arches

Monday, June 29th, 2009

As you can see in a lot of the photos, the wheels stick out a good six inches from the edge of the body. This is an MOT fail, so it was time to buy some flexible wheel arches.

The flexi wheel arches

The flexi wheel arches

I got mine straight from Tomcat Motorsport, but wherever you go, be ready for a smack in the wallet – these chunks of rubber cost around £220!
The wider ones actually come in two parts (one part is more solid rubber and you bolt some less solid rubber to it, as a six-inch lump of ‘floppy’ rubber wouldn’t be strong enough) which you put together yourself.

The front arch.

The front arch.

Then we riveted them to the car.

The rear arch

The rear arch

Meanwhile, my put-upon brother continued sorting out the electrics…

Nearly there!

Nearly there!

While the smallest mechanic tested out the newly-fitted passenger seat.

Im not sure hes got the hang of that spanner...

I'm not sure he's got the hang of that spanner...

Moving on…
Monday, June 22nd, 2009

The cooling system is finished! We’ve finally connected the pipes that run through the cab to the radiator. All the appropriate pictures can be seen by clicking here (I’ll add some more next week).

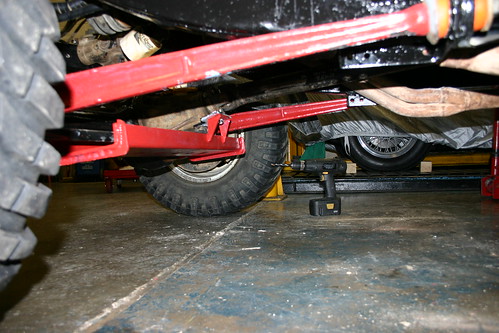
The water pipes underneath the car. The radiator is directly above them.

The water pipes underneath the car. The radiator is directly above them.

The brake lines are finished too, and the brakes are bled and working. Here are all the brake pipe photos.

Here you can see the (nearly) finished rear axle. Note brake pipes.

Here you can see the (nearly) finished rear axle. Note brake pipes.

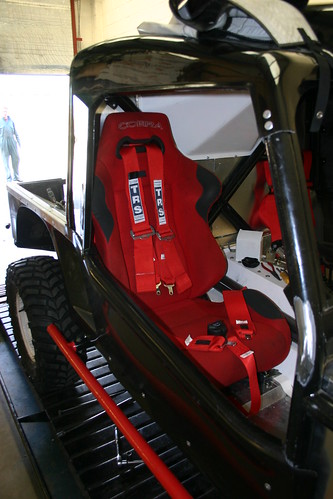
Also, we’ve got the driver’s seat in! This was a bit of a game as we decided not to use the supplied Tomcat seats, so the mounting points were in the wrong place. So we made up a bracket for the seat runners and bolted it in. We attached the shoulder harnesses directly to the rollcage behind the seat, and the side straps to the rear bolting point for the seat. We’ll find somewhere to attach the last belt next weekend.

Drivers seat with belts fitted

Driver's seat with belts fitted

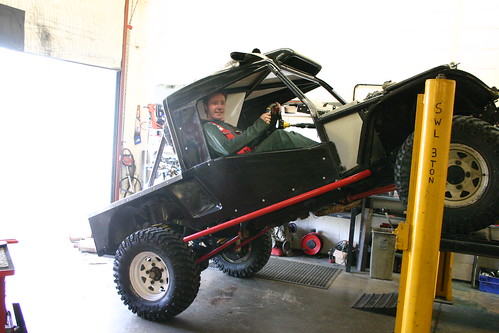
Then we lifted the front up on the ramp, for no real reason.

Whee!

Whee!

A quick update

Monday, June 15th, 2009

So, yesterday, we fitted the rear propshaft:

The blue piping is for the rear air locker.

The blue piping is for the rear air locker.

Attached the rear winch:

The rear winch, a Britpart 9500i

The rear winch, a Britpart DB9500i

And put the lights in the rear panels. We’ll be attaching them once they’re wired up.

Well probably end up using something stronger than tape.

We'll probably end up using something stronger than tape.

Bye!

Running out of time…
Monday, June 1st, 2009

We’ve set a self-imposed deadline of July 19th to have the car on the road, so we can take it to Billing. Then we took a look at our schedules and realised that we only have six build days left! We’ll work it out somehow.

The rear winch mounts are on, which can probably be best described by some photos:

The angle iron that will eventually hold the rear winch in place

The angle iron that will eventually hold the rear winch in place

Fitting the winch

Fitting the winch

Welding the plates in place

Welding the plates in place

Undercoat

Undercoat

And finished

And finished

The rest of the day was spent on bodywork (again). We’ve finished up the side panels, and riveted practically everything on.

Riveting stuff

Riveting stuff (and look - the rad is finally fitted!)

The only bodywork left to fix on is the front wings, rear light panels and bonnet (in so much as that is fixed). We also need to add some metal finishing strips to the rear of the car to cover up some creative bodywork adjustment.

All the external bodywork is on! Note the seat dumped on the right of the picture

All the external bodywork is on! Note the seat on the right of the picture

We also started to hack the dashboard to bits to make it fit around the wiper motor, with further hacking required to make the original instrument panel fit into it.

And that’s it! We’re not going to do anything else until the 14th June. Still on our “To do” list for the MOT:

  • Dashboard
  • Electrics
  • Battery and air pump box
  • Front winch
  • Front bumper
  • Rad pipes
  • Exhaust
  • Steering guard
  • Diff guard(s)
  • Wing mirrors
  • Fit windscreen
  • Wiper blades
  • Windscreen washers
  • Front lights
  • Rear lights
  • Rear brake lines
  • Fit bonnet
  • Fit front wings
  • Rear propshaft
  • Fuel lines
  • Air intake and snorkel
  • Fit Seats and harnesses
  • Check fluids
  • Start engine!

Six days..?

Bodywork

Sunday, May 10th, 2009

So, we have just spent a day doing (most of) the bodywork. Dear Lord, but there’s some chopping to do. My friend Nase summed it up quite well: “The rear tail section is the only bit that actually fits without needing modification. And we need to cut it up anyway because of the winch.”

Some of the mess chopping up fiberglass makes

Some of the mess chopping up fiberglass makes

We were expecting to have to do some modifying because of the number of different ways a Tomcat can be set up, but we ended up hacking huge chunks out of pretty much everything. Nothing is too complicated, but time-consuming.

The line marks one of the cuts for this wing

The line marks one of the cuts for this wing

The side walls, in particular, went on and came off again around fifty times. Still, it’s done now. We’ve lightly rivited the panels on, in case we have to take them off to get wiring in later. We’ll bang some more rivets in closer to the end of the build.

Passenger side

Passenger side

Still, it is starting to look the part!

Drivers Side

Driver's Side

Cooling, diffs and bodywork

Wednesday, May 6th, 2009

(Note – I’ve got some better photos of the cooling system somewhere, but I don’t know where they are . I’ll update this post when I find them.)

A cheap ARB-equipped diff came up for sale on a forum I look at, so that was job one this weekend. Unfortunatly my track rod protector (like this one, but bigger) had to come off first, and that required taking (hammering) a bolt from the radius arms out.

The paint is coming off already. Bah.

The paint is coming off already. Bah.

Still, now I have front and rear lockers, so that can only be a good thing, and I’ve fitted the front propshaft, so the front running gear is all done (apart from the fact that I lost the diff drain plug somewhere)!

To get the water from the rear of the car to the engine, we’ve used some flexipipe and some exhaust tube to run the water through the cab, next to the driver’s seat.

Ill kee my legs well clear, I think

I'll keep my legs well clear, I think

We’ll cover the tubes in heat wrap and paint them red (as required in the regulations). Now all we have to do is run tubing from the rad through the rear floor to join it all up.

In the midst of all this, we bit the bullet and started to cut up the bodywork. The front offside inner wing (top tip: The rear inner wings are the same, whereas the the front wings are different, and will only fit one way around, depending on which side the pedal box is on) needed cutting to avoid fouling on the roll cage and a power-steering mount on the chassis, and then we rivited it on in two places in case it needed to come off again.

No turning back now...

No turning back now...

We fitted the outer wing over the inner one, but we didn’t fix it as we still need to make the holes in it for the lights. It didn’t fit terribly well – hopefully some adjustments to the inner wing will help (we will fit the nearside wings together before mounting them on the car). The outer wing needed cutting to avoid the rollcage, and also the top of the suspension mount.

A quick note about the rear winch – I happen to have some thick angle iron that’s exactly the right size, so I’ll cut some channels into it to avoid the rear rollcage and paint it up. Hopefully that will be quite a quick job!

This may take some sawing...

This may take some sawing...

Plodding on

Tuesday, March 31st, 2009

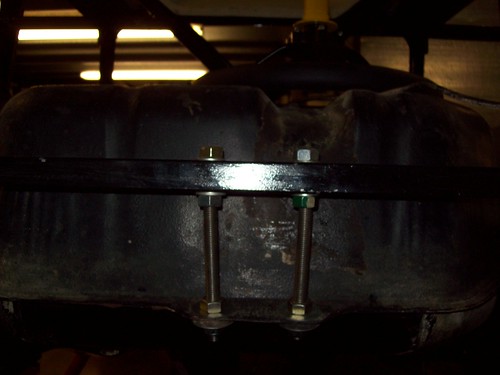
The fuel tank is in, held level using bent studs.

The rear of the fuel tank

The rear of the fuel tank

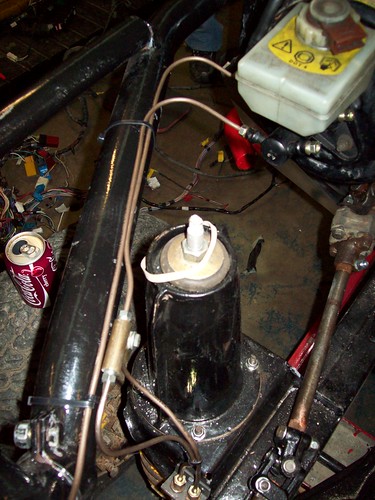
The front brake lines are in, too.

Front brake lines

Front brake lines

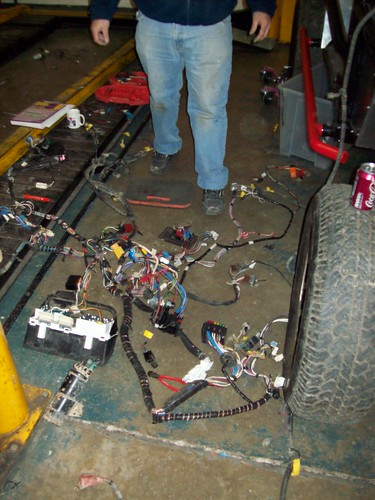
Finally, oh dear God, we took a look at the electrics. When we removed the wiring loom from the Range Rover we labelled all the wires with strips of masking tape. Since then, the labels have either fallen off or rain has washed the writing on them away.
Great.
So, my brother was lucky enough to have the job of figuring it all out again, which he did by re-wiring as much stuff as he could on the floor of the workshop.

Lots of head-scratching going on here

Lots of head-scratching going on here

This would have been easier if (a) I hadn’t ditched a load of the switches along with the body of the Range Rover, and (b) if the Haynes manual had the right colours for the wires in its wiring diagrams.
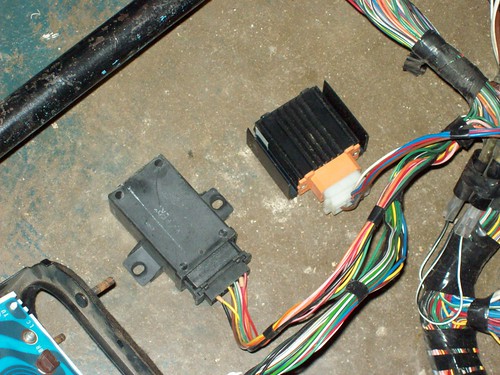
Still, he got there in the end (re-labelling as he went), but there are two components we don’t recognise.

Mystery Parts

Mystery Parts

I’ve asked the clever people at the Devon 4×4 Forum what they might be, so no doubt I’ll know soon, and I’ll let you know.

[Update] On the left, the central locking controller, so that can go. On the right, the headlight Dip/Dim controller, which has to stay. Good work, Internet!

Fuel Tank Issues

Monday, March 9th, 2009

Lots of Tomcats are fitted with aftermarket fueltanks, usually all pretty and shiny, and made of aluminium. As I’m trying to do all this on a budget, I’m going to use my old Range Rover one. There are a few problems with this.

  1. It’s meant to be mounted at an angle, and my frame is flat
  2. Although there is a section built into the rear frame where the tank would fit, it would get in the way of the rear winch.
  3. Only very early Range Rovers have locking fuel caps, as the flap locked on the bodywork of all the later ones.

So, we decided to move the existing mounts forward, and mount the tank at (close to) the original angle. We cut the box section away, then welded them back in further up.

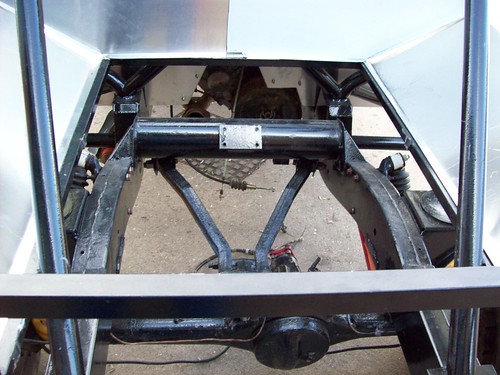
Rear of the Tomcat with the box section removed.

Rear of the Tomcat with the box section removed.

Welding the box section back into place

Welding the box section back into place

The (grubby) fuel tank, in its new place. We will use spacers to get the angle right.

The (grubby) fuel tank, in it's new place. We will use spacers to get the angle right.

We’ll try and grab some rubber mounts for it, but I’m not convinced they’re really needed (if we’re flexing the fuel tank, then we’re flexing the chassis). A Land Rover breakers up the road has a filler neck and locking cap from an old Range Rover, which is mine for £25. The only thing missing is the cap key!

We also mounted the hand brake. We put it right at the back of the transmission tunnel, with some chequerplate mounted underneath to strengthen it.

Viewed from under the car: Making a cardboard template for the chequerplate.

Viewed from under the car: Making a cardboard template for the chequerplate.

As you might have seen in the early photos, the Range Rover had a Britpart DB9500i on the front (here is a photo) which has been very good, but it has always been very difficult to pull the rope out by hand. This winch is now going on the back, as I have just (literally an hour ago) agreed to take a Warn 8274 off a nice chap’s hands (more on that in the future). So, we decided to take the Britpart winch apart to see if we could spot anything wrong.

Some bits of winch.

Some bits of winch.

It was all fairly straightforward and came apart easily. We cleaned and oiled all the moving parts and put it back together.

Cleaning the winch. Note the gearbox in the foreground.

Cleaning the winch. Note the gearbox in the foreground.

Cleaning made a big difference, but it’s still not perfect. We have since realised that we didn’t knock the braking mechanism from the inside of the winch drum, so we’ll do that next time we go to the workshop.

Finally, we made some brackets to hold the brake lines to the chassis.

Brake line brackets

Brake line brackets